Salesforce Integration Guide
How to sync a Salesforce and an iovox account
This guide takes you through the steps required to send call events into Salesforce. This can be done in 2 ways:
1. Integration via the iovox Enterprise Portal
Set up Salesforce from your iovox Enterprise portal account online.
2. Integration via the iovox Web Portal
Set up Salesforce from your iovox portal account online.
3. Integration via the iovox JavaScript API
Set up Salesforce by adding JavaScript to pages.
1. Integration via the iovox Enterprise Portal
Account set-up Steps
Please follow the below workflow in order to create a new trackable item.
Creating the JS API Rule Template
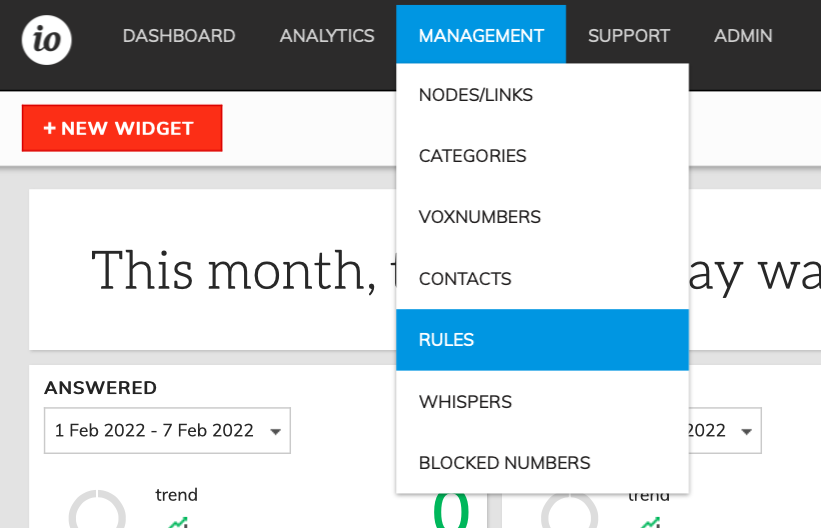
1. From the top menu, select Management >Rules>.
2. Select "New Template".
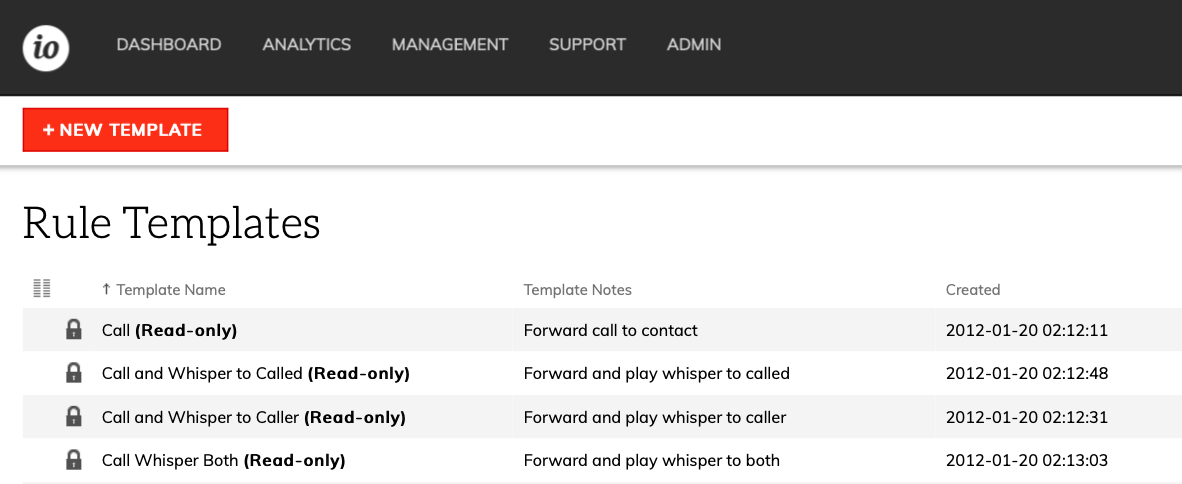
3. Enter a name for the new rule template.

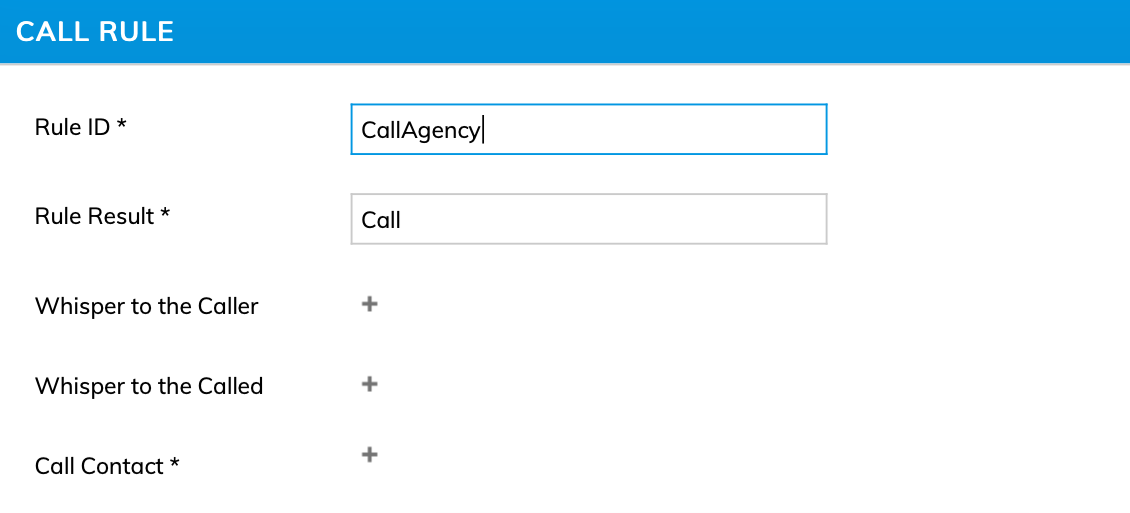
4. Add the first rule by clicking the "Call" button.

5. Change the Rule ID and Rule Result if desired, otherwise leave the defaults and then click the + symbol next to "Call Contact".
6. From the "Select a contact" dialog, check the box labelled "Make this rule a variable" and then click "Finish".
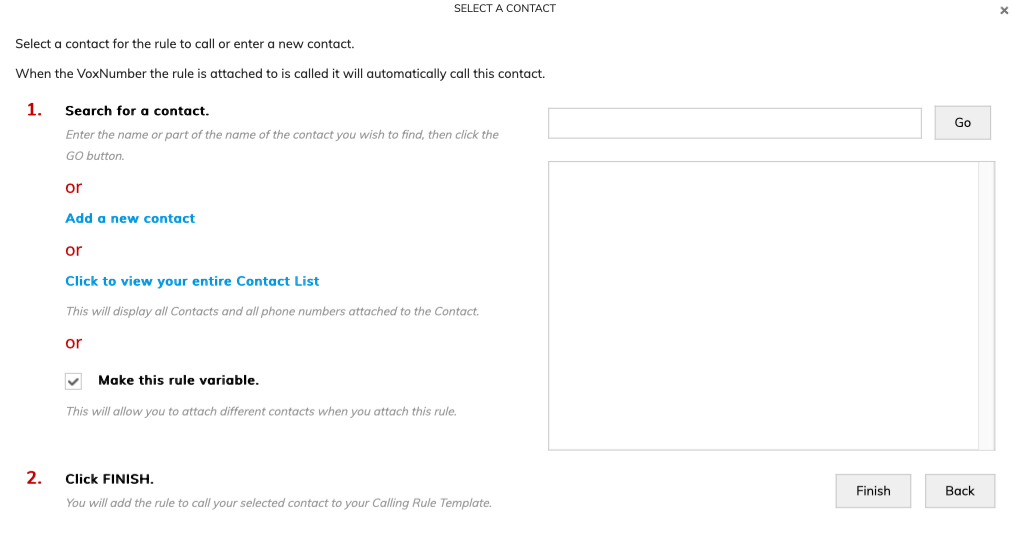
7. The contact dialog will close, and you can now click the "Save" button, notice that the "Call Contact" is now set to "?".

8. Add a rule to continue the call flow when the call completes. While hovering over the "Call Rule" , click the "Add Rule Below" button.
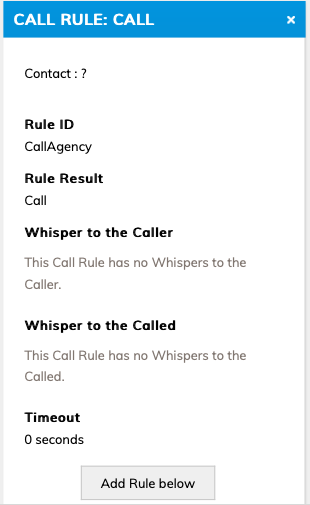
9. Select all outcomes and click the "Add" button.
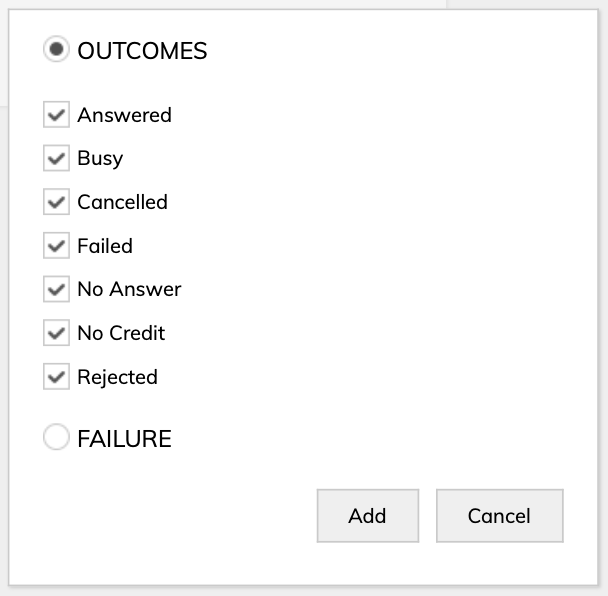
10. Add a rule to continue the call flow for the call outcomes. While hovering over the "Call Result Rule" , click the "Add Rule Below" button.
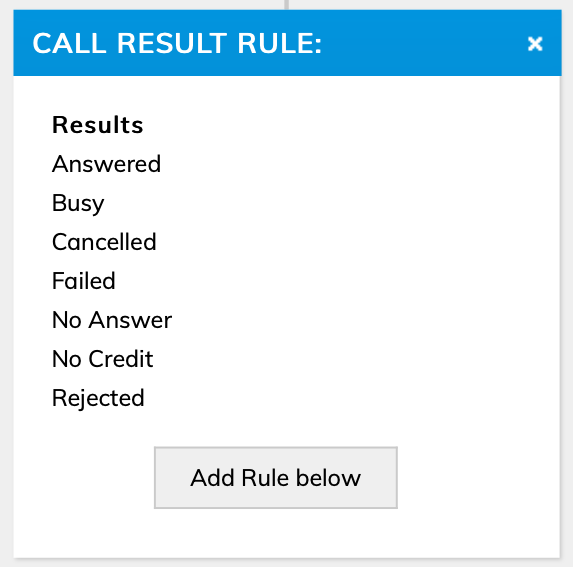
11. Click the "Http Request" button to continue.
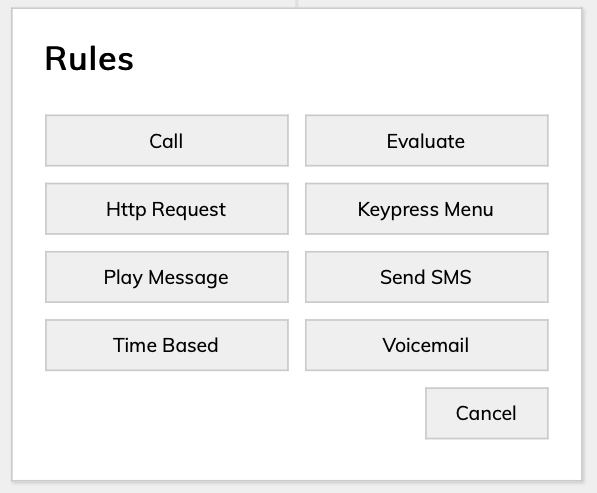
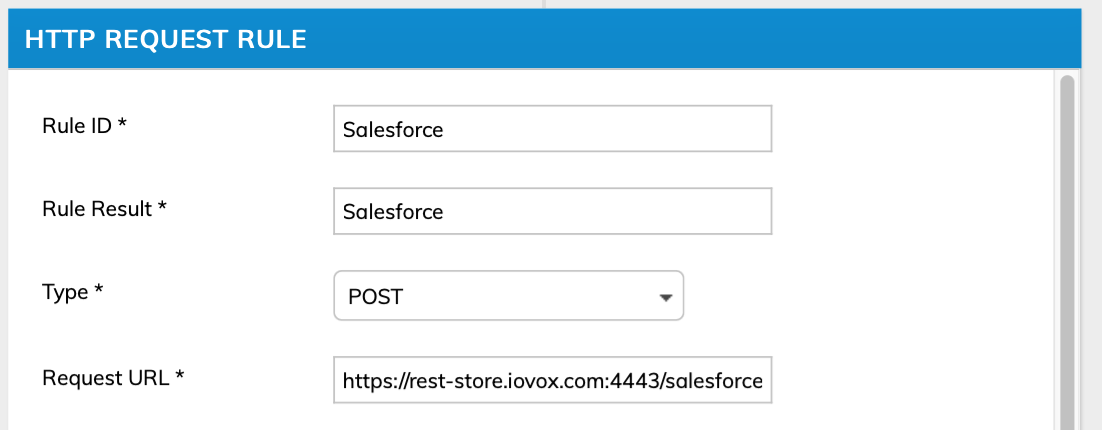
12. This is where the Salesforce event injection details need to be setup, set the "Rule ID" and "Rule Result" . In the "Type" dropdown select "POST" and set the "Request URL" to "https://rest-store.iovox.com:4443/salesforce".
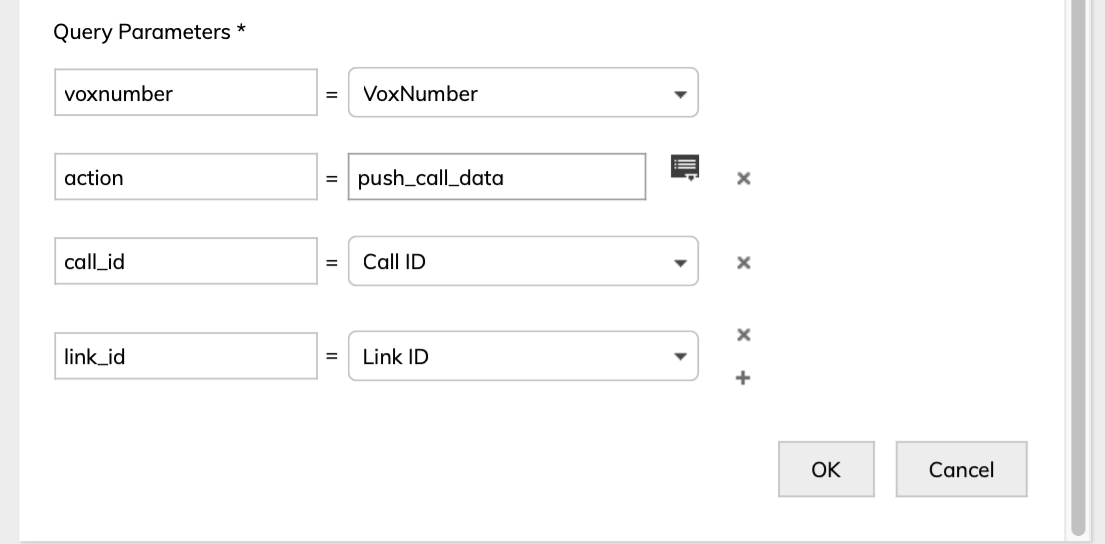
13. For the event to be recorded in Salesforce there are certain required fields, these are listed in the table below, some of the values need to be set added using "Add a custom value..." , while other use internal fields.

14. Enter the query parameters as shown below, the tid needs to be specified by the customer, DO NOT use the example value below. Then click the "Save" button.
15. The last step is to click the "save" button to save the entire rule template.
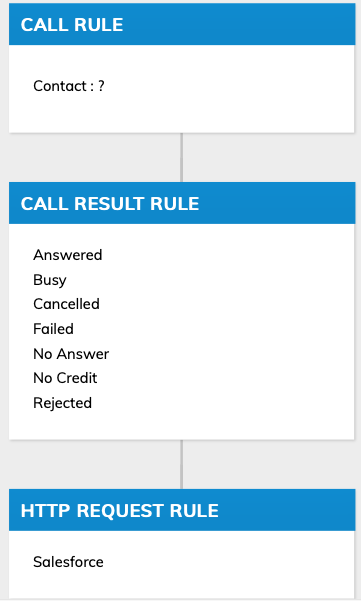
Once the Rule Template has been created, you will need to create Contacts, Nodes, Links and assign the Rule to the Links.
2. Integration via the iovox Web Portal
! Please note that for the integration, your Salesforce account must be ENTERPRISE or UNLIMITED level.
Account set-up Steps
Please follow the below workflow to track one or several Item(s) in your account.
The iovox / salesforce integration is an OAuth integration with salesforce. The initial integration is designed to push all calls to the salesforce platform as "Activities" tied to a salesforce "Contact".
1. Authentication
To set up the integration you will need to navigate to: https://desktop.iovox.com/integrations/salesforce/setup
The user will be redirected to the salesforce login page.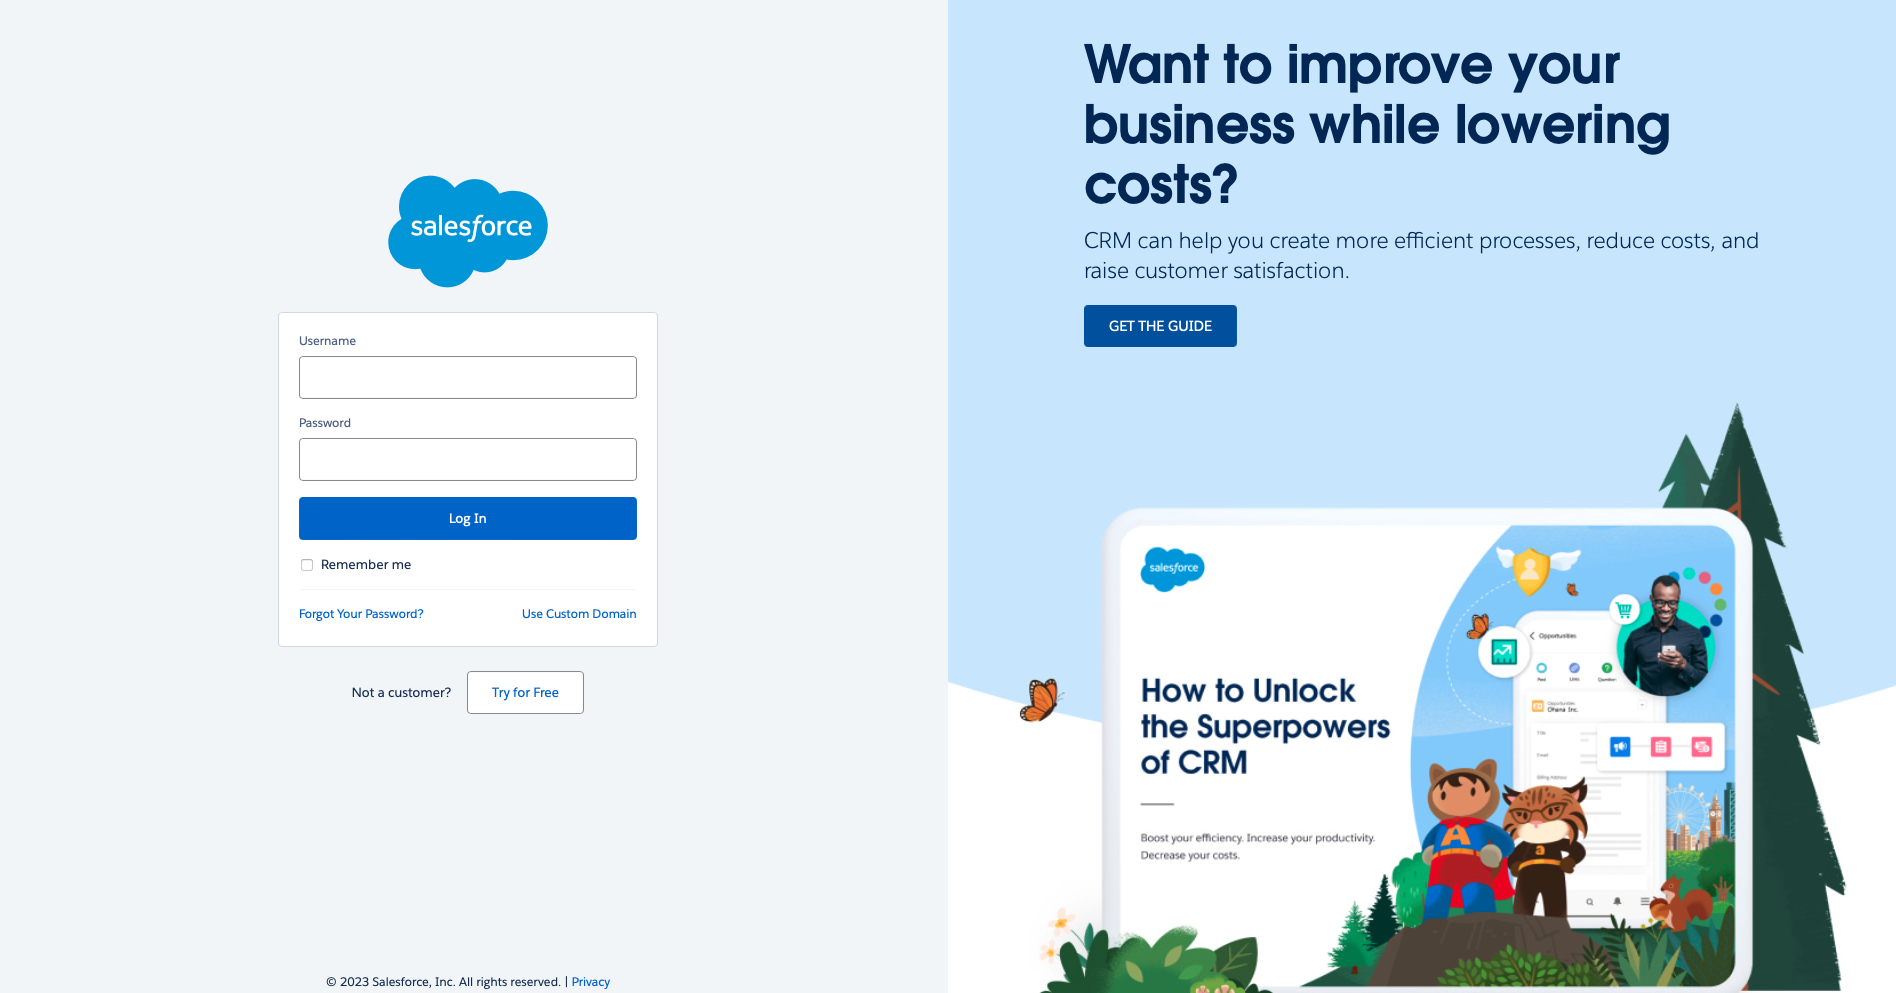
*You will be prompted to log in to the iovox platform if they are not already authenticated.
Once the user authenticates to salesforce they will be presented with an authorization screen to allow iovox to access their salesforce account data.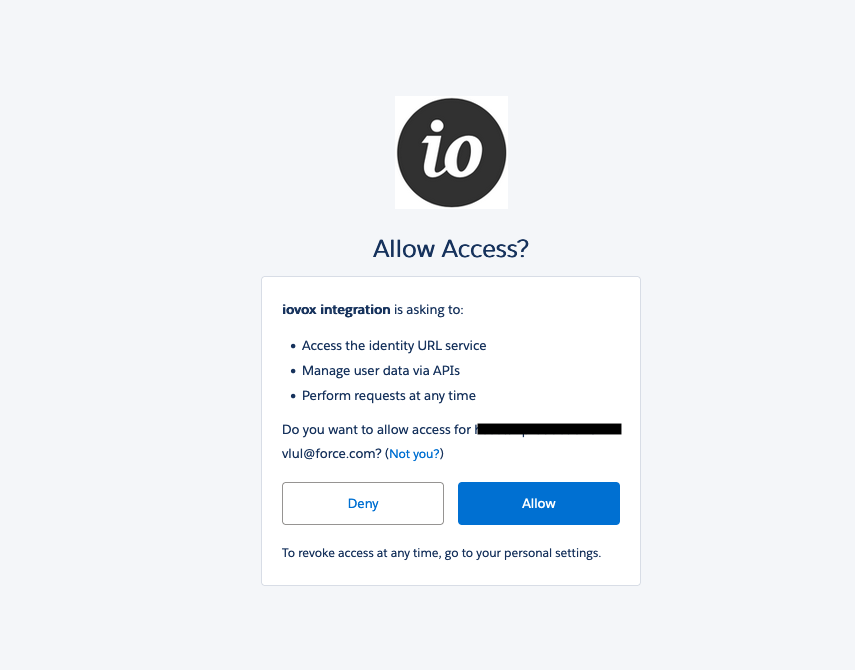
Click on "allow".
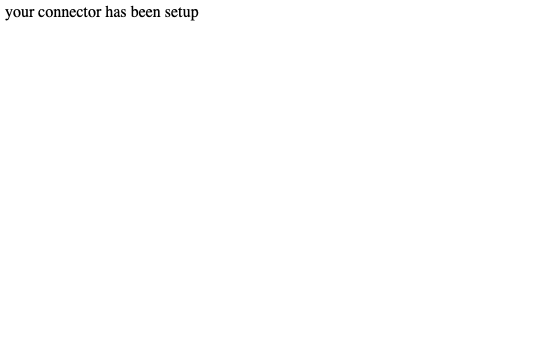
You will be directed back to the desktop environment and will see the following message when the integration setup has completed.
3. Integration via the iovox JavaScript API
1. Overview: How does it work?
The JavaScript allows a single page to display different numbers depending on the source which the user has reached the page.
When the page loads, you decide what to display on the page. For instance, a list of properties, a list of agents, and one agent.
When it is a list of properties, for example, you know which properties they want to display. The output of each property could be address, pictures of property, price, and agent.
2. Documentation
All our API documentation is kept securely online, to access it you will need a username/password.
https://docs.iovox.com/display/JA/v2
4. Your iovox calls in Salesforce
Your Contacts activity
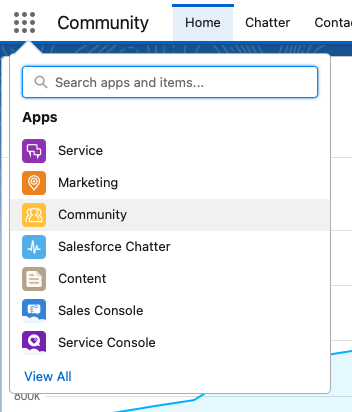
Log into your Salesforce account, and click on "Community"
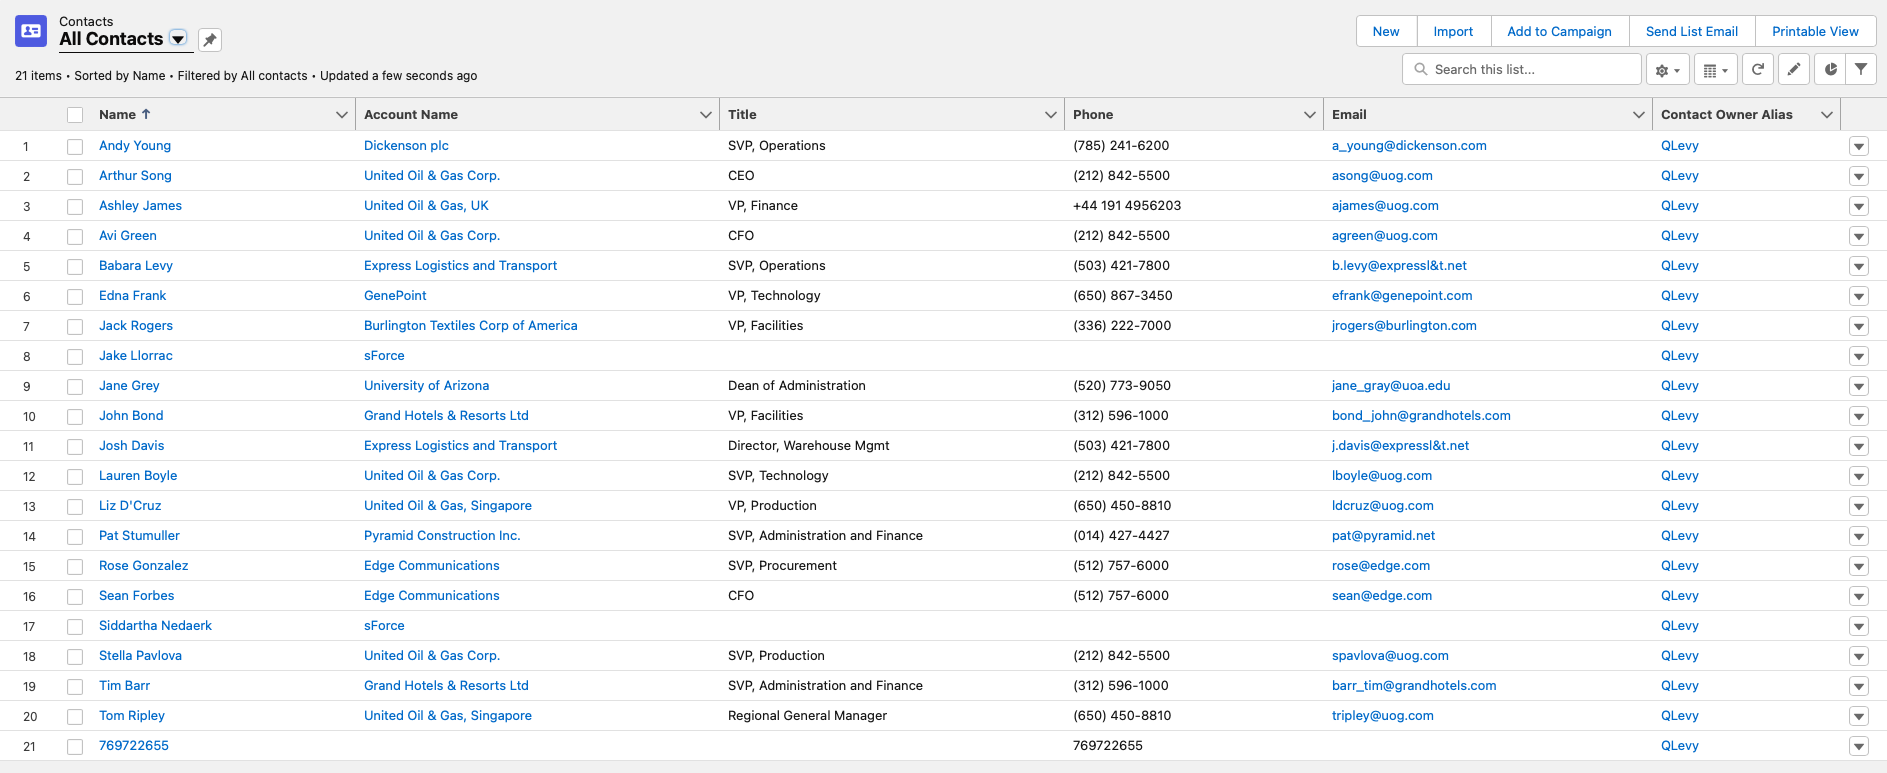
Then check your "Contacts" page

From there you will see the full list of your Salesforce Contacts
Click on a Contact to see the call activity from the side menu
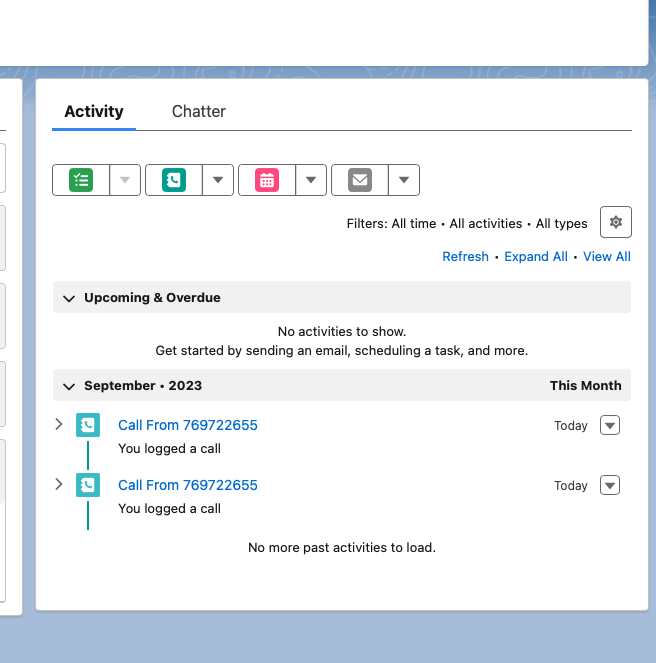
Please note that if the phone number from the iovox call activity corresponds to an existing Contact in your Salesforce account, the activity will be added to the existing Contact. If the phone number does not match any of the Salesforce Contact, a new Contact will be added with the Phone Number as the Name.
If you want to access the call recording, call transcription or tags, please check the url in the comments section. This URL will lead you to the Call Details in your iovox Account.

Ponte en contacto con nuestro equipo para explorar nuestros productos y soluciones
Contáctanos
Mándanos un mensaje y un miembro de nuestro equipo te responderá lo antes posible.
O llámanos al. +34 911 898 159